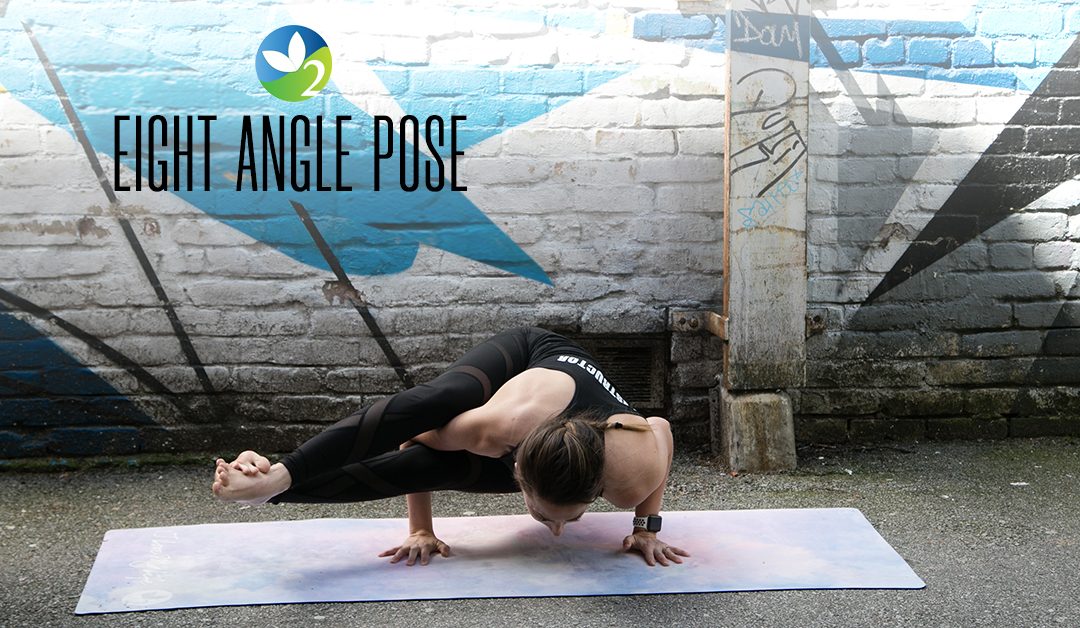
Tap into your inner balance, strength, and flexibility with eight-angle pose astavakrasana. While this pose looks like an impossible balancing pretzel, it is a lot less involved than it appears at first. There are multiple ways to get into those pose and we’re going to cover just one. Remember, just like any other advanced pose, that you should be warmed up first, both physically and mentally, in order to create space and have success in the asana.
Benefits:
Strengthens the wrist, arms, and abdominals. Improves balance, focus, and coordination. The twisting aspect of the pose helps with digestion and detoxification.
How to:
- Begin in a seated position, dandasana, with your legs extended out in front of you.
- The beginning of this pose is very similar to elephant trunk pose that we broke down in a previous post. Bend your right knee in towards your chest, and create space in your hips through gentle movement and focused breathing.
- Bring your right arm to the inside of your right leg and under the right knee. Reach for your right foot (or ankle) with your left hand, and wiggle that knee over your shoulder, or as close to over your shoulder as your body lets you get.
- Engage your thigh so that it doesn’t slide down the shoulder. At the same time, make sure that you flex your right foot, which is really important for the next step!
- Making sure your right leg keeps hugging your right shoulder, bring your left leg up and cross your ankles over each other. That flexed foot position is important to make sure your feet don’t come apart.
- Make sure your hands are placed on the floor, parallel to each other, on either side of your hips with your fingers spread wide.
- Lift your chest and engage your core as you slowly start to press your right leg forward and lift your hips off the mat.
- Make sure, as you get closer towards the mat, that you are bending your elbows in a more or less 90 degree angle, just like you would in chaturanga. Keep everything else off the floor except for your hands. Straighten your legs as much as you are able, but don’t worry if you’re keeping them bent as you learn to get comfortable in the pose.
- Don’t let your shoulders roll forward in this pose, and try to keep your gaze slightly lifted to maintain stability in your neck and spine.
- Repeat on the other side.
Modify it:
Sometimes using blocks under our hands in this pose can help with creating the physical space needed to maneuver into the pose. You can also use a block underneath your bottom hip (your left hip if you’re following our directions) to give you the lift until you’re ready to do it on your own!